Fit for a King
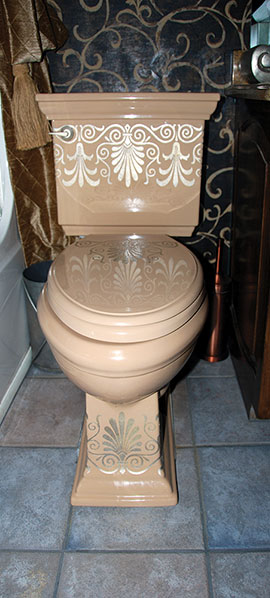
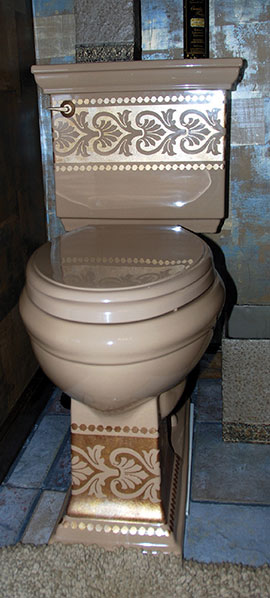
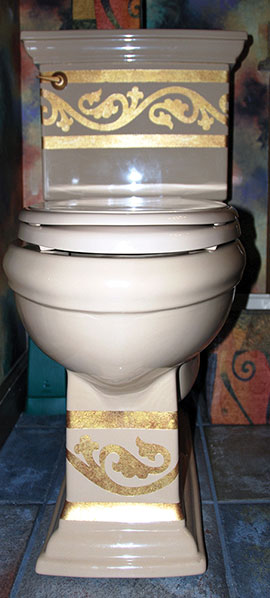
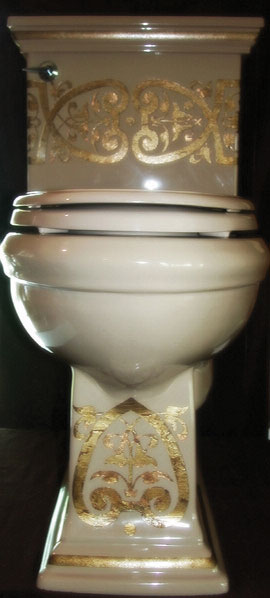
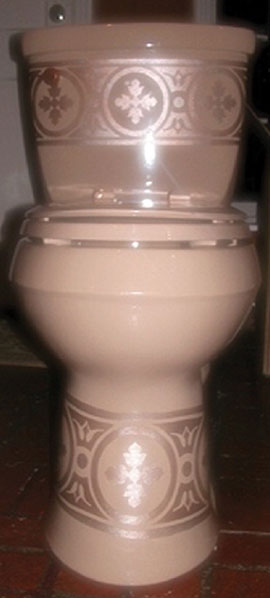
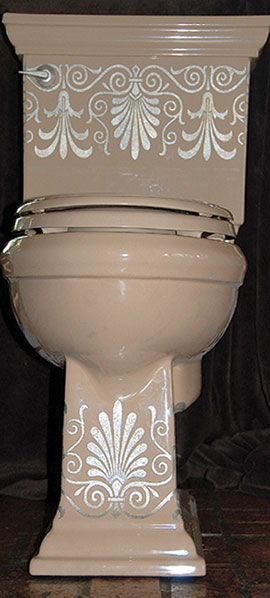
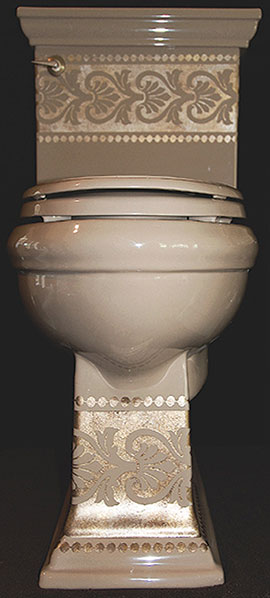
Possibly the most understated yet completely necessary feature of any home is, you guessed it, the Commode, a.k.a. the Toilet, Loo, Porcelain Pot, John, Latrine, Can, Comfort Station or the most fitting for this particular article, the Throne! Through the years so many advances and aesthetic upgrades have been made to nearly every household appliance, but pity the poor “potty”. It’s often all but forgotten, down graded even, from the days of the fashionably decorated wash-basin and chamber pot. Now, it’s simply considered utilitarian; it’s cold, it serves one purpose and one purpose alone that frankly no one (except Oprah) wants to discuss. So why accentuate such a private and personal thing? Well, I suppose the concept is rather like wearing pretty under garments when you’re merely going to work. Only you know it’s there and it makes you feel good, even a little sassy. Kathy Wear of Artistic Finishes located 20 miles north of Nashville in Hendersonville, TN has turned quite a few of these under-appreciated and seldom embellished water closet centerpieces into fun and even elegant fixtures from “head” to toe, pardon the pun. It takes a lot of skill and creativity to see the potential in finishing this type of surface. It also requires an in depth knowledge of the paint products that are used to ensure that the chosen finish will adhere properly and then last through the wear and tear that this particular surface can endure. Kathy has studied extensively over the years to perfect her craft, including formal training in the use of Faux Effects® products at Decorative Finishes Studio in Louisville, KY. She is known amongst her peers for her innovative and original designs. Classic, unique, yet functional is a great way to describe her approach to the decorative arts.
Most commodes are made of glazed and fired clay, which is quite shiny and slick. Thorough preparation of this type of non-porous surface is crucial for the longevity of the finish. A light sanding of the entire surface and then making sure it’s very clean and dry is a must. After the initial prep, Kathy applies her Modello or EzStik™ Stencil. A thin coat of PrimEtch™ is then applied and allowed to dry overnight. A coat of sizing is applied and when set, gold and /or silver leaf is applied.Kathy then seals in the leafing to prevent tarnishing. Depending upon the specific color scheme and design flow in the room, she will then apply various products like LusterStone®, MicaGlow™ Flakes, Stain & Seal™ with AquaCreme™ and MetalGlow® metallic paints to embellish the stencil pattern further. Once complete, an additional coat of leaf sealer is applied followed by a finish coat of C-500 Urethane™ for extreme durability. Finally the stencil is removed.
Kathy’s very first faux finishing project was for the Middle Tennessee Parade of Homes. Designer Joni Wohlfahrt told Kathy about this event and persuaded her to participate. Joni was lending her talents to design a room in one of the homes and asked Kathy to assist her by creating a faux finish to accentuate her vision. Kathy made a few samples for Joni, and ended up painting eight different rooms in the home. Although she says that she was a nervous wreck during the process, the project won her the respect of local designers, builders and artists as well five awards including Best Faux Finish from the Middle Tennessee’s Builders Assoc., and the Peoples Choice award for Faux Finishing. Kathy has been steadily working full time from that point on.
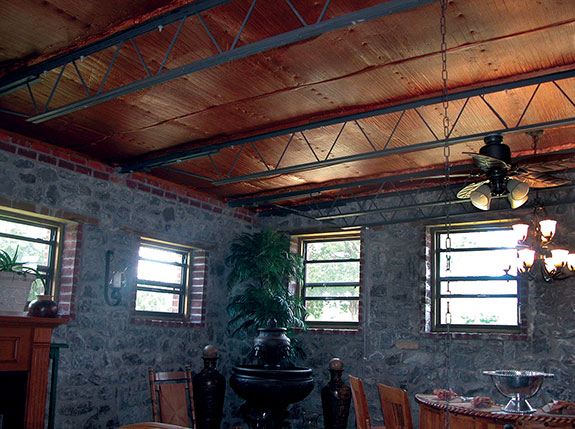
Among other specialties like hand-troweled plaster finishes and murals, Kathy has a passion for ceilings. Last year alone, she completed over 30 different ceiling finishes, each one unique to its space. She loves how adding an effect on a ceiling “completes the look of a room.” In the “parade” home, Kathy created many gorgeous finishes although one finish in particular was truly inspired. The existing ceiling in this large room with stone walls was simply made up of insulation material. Kathy applied FauxMetal™ Copper directly over the silver backing.
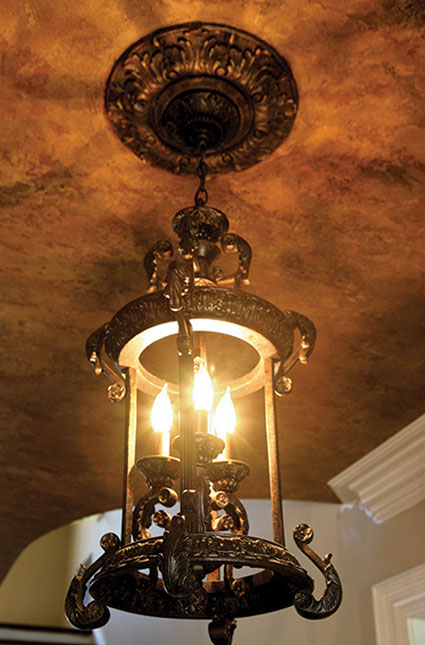
When the paint was dry, she applied two separate AquaCreme™ mixtures at the same time, one tinted with FauxCrème Color™ Black and one with Earth Brown. While the glaze was wet, she used a rubber trowel and scraped over the surface forcing the glaze into the recesses. The end result simulated a beautiful hammered copper ceiling. In the foyer of another part of the home there is an equally exciting ceiling finish that gave an otherwise dull area a lot of character. A rich brown cracked plaster effect was created using Camel SetCoat® as its base. Kathy applied AquaCrackle Size™ and then tinted RsSandStone® and RsStone® randomly over the surface and let it dry and crack. She then stained the surface with Rich Brown Stain & Seal™ and finally toned it all with AquaCreme™ and FauxCrèmeColor™Dark Brown.
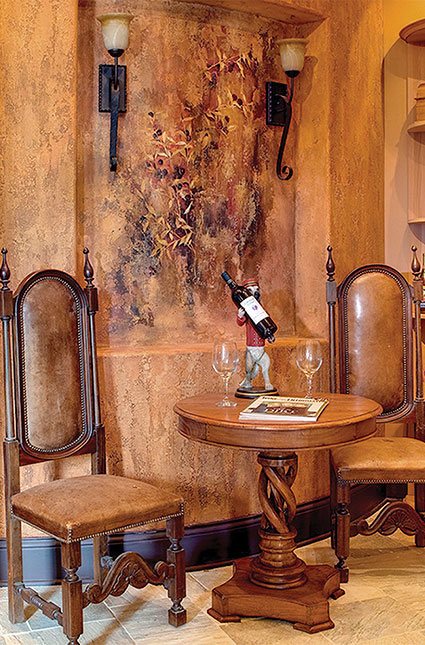
A more delicately detailed finish was applied to a groin vaulted ceiling using Modello stencils and custom tinted LusterStone® colors. The wine room of the home is decorated with heavily textured walls and a distressed olive branch mural, which captures the essence of old Italy. RsStone® Fine and Super Fine were used over sizing to mimic cracked plaster. Antique Mahogany Stain & Seal™ was applied and allowed to dry and a final toning coat of AquaCreme™ tinted with FauxCreme Color™Dark Brown completed the look.
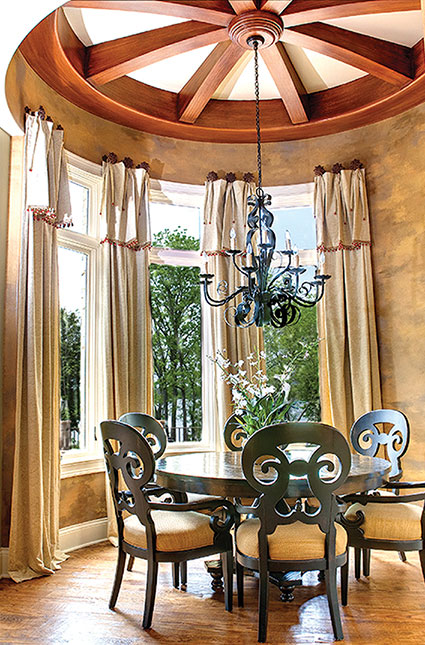
The classic country dining room allowed Kathy to display her wood-graining skills.The drywall “wagon wheel” above the dining table started with Woody Yellow SetCoat and was “grained” using Rich Brown Stain & Seal™ and a chip brush. Kathy then toned the effect with another coat of Rich Brown tweaked with a small amount of Antique Cherry Stain & Seal™.This was the perfect accent for the wall finish where Kathy used several complimentary latex paint colors mixed with AquaGlaze® and gently blended them together on the wall with a rubber trowel. She finished the very earthy look by applying a thin coat of AquaWax™ and buffing it to a shine.
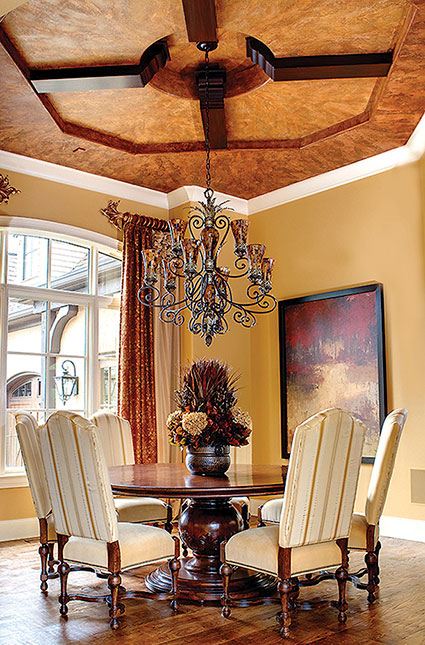
Warmth and elegance invite you in to this large dining room of a private residence. Hardwood floors and calming earth tones on the walls is the perfect frame for the crown jewel ceiling finish. Kathy created incredible depth and texture using RsSandStone® Flake and RsStone® Fine over Neutral White SetCoat®, which was coated with AquaCrackleSize™. Once the texture was dry she applied three separate AquaCreme™ color mixtures. The first being FauxCreme Color™B urnt Sienna, next, Earth Brown and finally she mixed together Earth Brown and Earth Green. When the glaze was dry, she applied Stain & Seal™ Antique Mahogany mixed with AquaCreme™ over the entire surface. Her final application was achieved by skip troweling three different RsWaterWax® color mixtures tinted with FauxCrème Colors™ Earth Green, Burnt Sienna, and Brown and then buffing to a shine.
Kathy’s work has been published locally and nationally and can be seen currently on Southern Homes and Lifestyles Television.

DECORATIVE ART BY: KATHY WEAR
PHOTOGRAPHY BY: KATHY WEAR
WRITTEN BY: CAT FAUST
If you enjoyed this article, send
it to your friends on Facebook!

